
10 Trendy DIY Nail Designs for Prom
Prom night is one of the most memorable events in a high school student’s life, celebrating style, friendship, and the end of an era. Every detail matters, from your dress to your accessories, especially your nails!
But salon visits can be EXPENSIVE. No worries! EditmyNails is here to help you. Ditch the salon, grab your polish, and get creative.
We’ve got you covered with the top 10 trendy DIY nail designs that are budget-friendly. Let’s find the perfect prom nails to make you stand out without breaking the bank.
Disclosure: This article contains Amazon affiliate links. As an Amazon Associate, I earn from qualifying purchases. If you click on a link and make a purchase, I may earn a small commission at no extra cost to you.
1. Glitter Tips
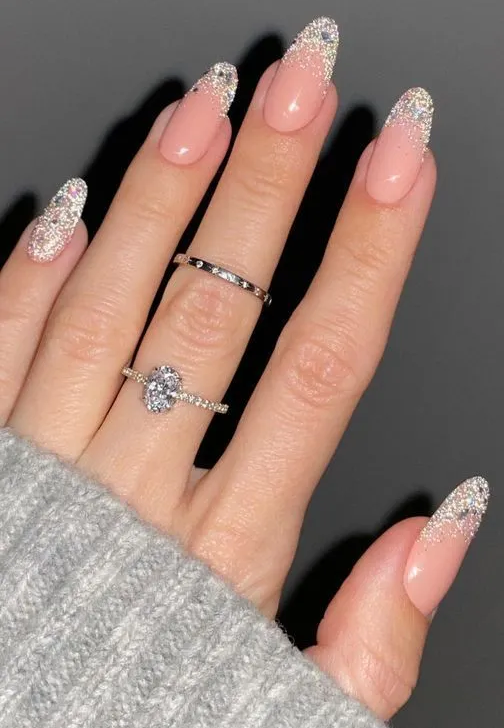
Glitter gives you an elegant look in no time, and obviously, you can’t go wrong with a French manicure. Add a touch of prom night sparkle with a glitter accent on the tips. If your dress is black, here is another one to try out.

You can do these Stiletto-shaped glitter tips at home in four simple steps
- Apply a thin layer of base coat (for nails to be protected) and let it dry completely.
- The second step is to apply two coats of nude pink nail polish.
- Using a thin nail art brush, apply white nail polish to the tips, following the natural curve of your nails to create a French tip.
- Once the white tips are dry, apply a layer of glitter nail polish over the French tip. If you’re using loose glitter, apply a clear polish first, then dip your nail into the glitter or sprinkle it on. Press the glitter down gently to make sure it sticks.
2. Ombre magic
Ombre nails are a trendy and easy DIY option for prom. Your job is to choose two or three complementary colors that match your dress or accessories.
Apply them in stripes on the makeup sponge, slightly overlapping. Dab the sponge onto your nail, and repeat for more opacity. Apply a top coat and let your nails dry.
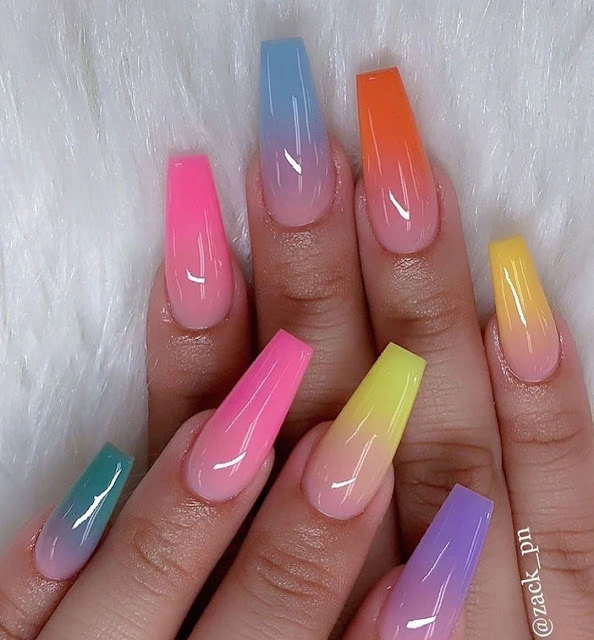
For this rainbow effect, paint each nail with a different shade, blending them seamlessly at the edges with a makeup sponge or cotton swab dipped in nail polish remover.
3. Chic Chevron
Chevron nails are a fun and easy idea for prom. Paint your nails with the lighter of the two nail polish colors. Place chevron nail stickers or tape on your nails, creating the desired chevron pattern(A V-shape or cross, whatever you want).
Then, paint over the entire nail, including the stickers, with the darker nail polish color. Carefully remove the stickers or tape while the polish is still wet to reveal the chevron pattern.
4. Polka Dots
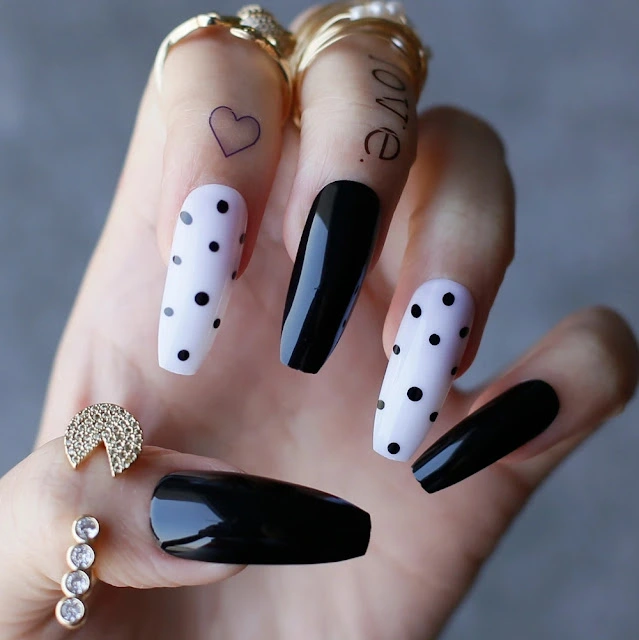
To create polka dots, you either need to have a dotting tool or you can just use a bobby pin. Whatever you are using, press it gently and experiment with different angles, sizes, and patterns.
5. Water Marble
Marble nails offer a stunning, unique design that can elevate any outfit. The best part? You can achieve this luxurious look at home with just a few simple steps!
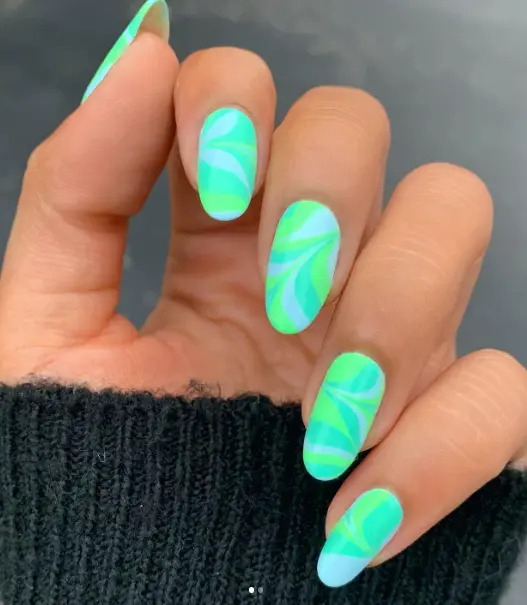
Paint your nails with a white base coat and let them dry completely. It helps the marble colors show up more vibrantly.
1. Drop Method:
Drip one or two drops of each contrasting color polish randomly onto the white base coat that is still slightly wet. Don’t overdo it- a few small drops are enough.
2. Swirl Method:
Apply a small amount of each contrasting color polish onto a separate surface (like a plastic palette). Dip the tip of your toothpick into one color, then gently touch the polish to your nail and drag it slightly to create a veiny, marbled effect.
Repeat this with other colors, swirling them together lightly to create a beautiful marble pattern.
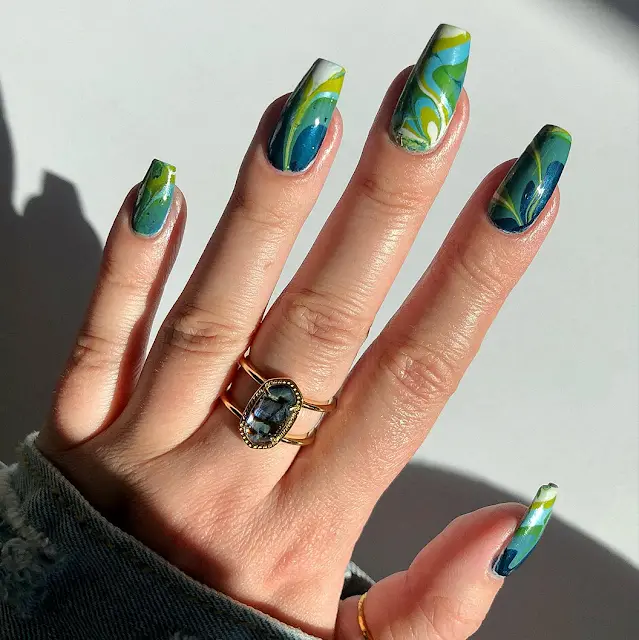
Once you’ve applied your color drops, use the toothpick to gently swirl and manipulate the colors on the nail, creating a marbled pattern that resembles real marble. Be careful not to overwork it!
The beauty of marble is its natural flow
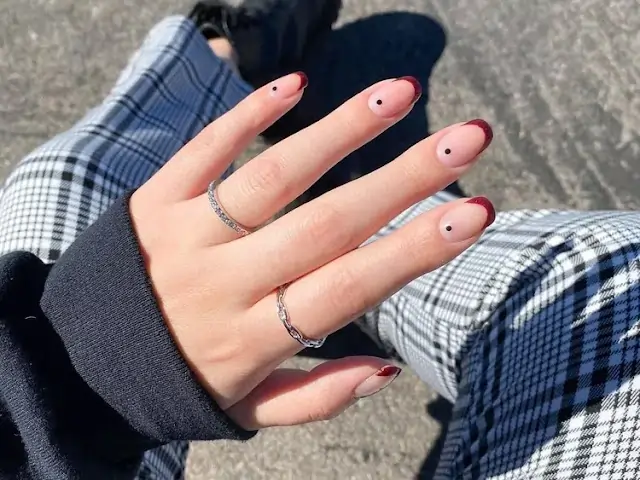
6. Minimalist Magic
“Less is more”.Try a minimalist design for a more subtle and sophisticated look. This could be a single accent nail with a geometric shape, a thin line detail, or a negative space design where part of your natural nail shows through.
Minimalist Design Ideas:
- Dotticure Delights: A neutral base with just a few small dots in a contrasting color strategically placed on each nail.
- Single Color with Thin Line: Paint all your nails in a single color and add a thin line in a contrasting color near the tip for a simple yet elegant design.
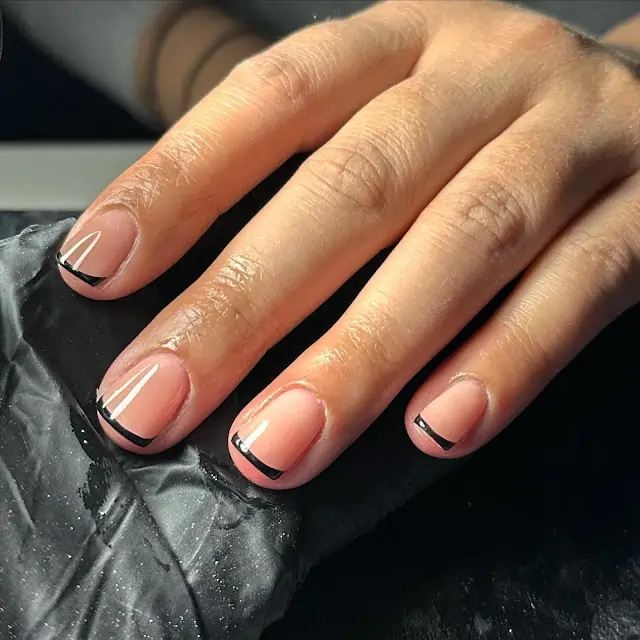
Clean up is Key here. Even minor mistakes can stand out in a minimalist design. Clean up any polish mistakes around your cuticles for a polished finish.
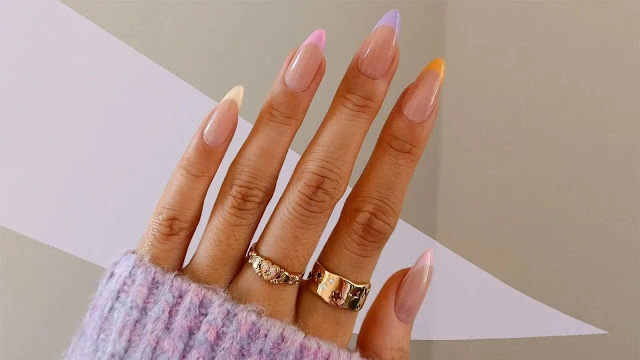
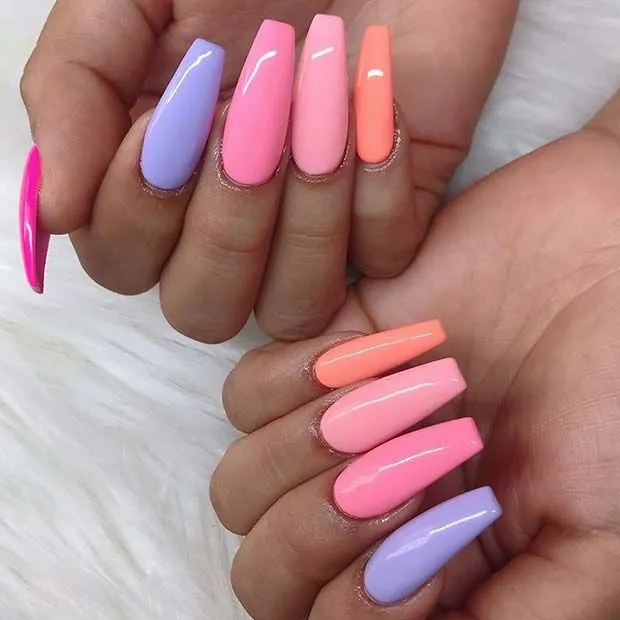
7. Mix and Match Pastels
Pastel colors are soft, feminine, and perfect for spring proms. Create a playful look by painting each nail a different pastel shade. Choose pastel shades that complement each other. You can stick to a cool-toned palette (blues, lavenders, mints) or a warm-toned palette (pinks, peaches, yellows)
Pastel Designs for Prom:
French Tip with Pastel Accents: Keep your base coat nude or a very light pink, and then paint the tips of your nails with different pastel colors for a modern French manicure twist.
Rainbow Pastels: Paint each nail a different pastel shade in rainbow order for a fun and vibrant look.
8. Negative space Nails
Negative space nail designs are trendy and surprisingly easy to achieve. They allow you to leave sections of your natural nail exposed for a modern look. There are two common approaches to creating negative space nails.
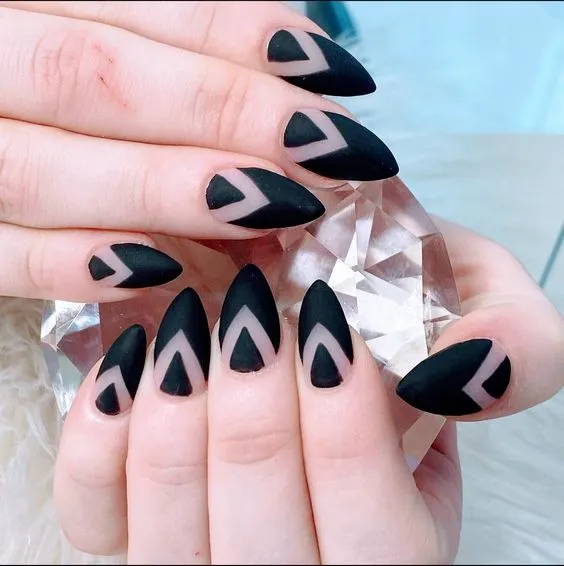
i. Negative Space with Geometric Shapes:
It involves three steps
- Cut small strips of striping tape and apply them to your nails in your desired geometric patterns (think triangles, chevrons, half-moons).
- Paint the exposed nail surface with your chosen color(s) and let it dry completely.
- Carefully remove the striping tape to reveal the negative space.
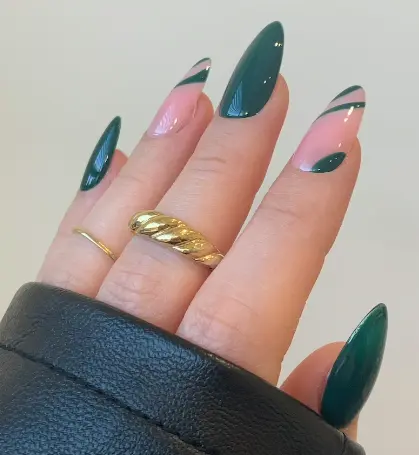
Freehand Negative Space Designs: This one only works if you are an expert.
Paint your nails with your chosen base color (optional, not all negative space designs require a base color). Let it dry completely.
Use a small nail art brush or a toothpick dipped in polish remover to create freehand designs, leaving sections of your natural nail exposed.
Once your design is complete, apply a top coat to seal your manicure and add shine. One option could be a ‘French Tip with Negative Space‘. It gives you a modern twist on the French manicure with a thin colored line at the tip and the rest of the nail left bare.
