
#1 Best Acrylic Nail Kit for Beginners with Everything
If you’ve ever watched a nail tech effortlessly sculpt flawless acrylics and thought, “I wish I could do that at home”—good news: you absolutely can. The secret? Starting with the right kit. While Amazon is full of acrylic nail sets that promise to have “everything,” most fall short with low-quality powders, runny monomers, or missing essentials. That’s why when beginners ask me which kit is truly worth their time and money, my answer is always the same: the Young Nails Acrylic Starter Kit. It’s the one box that actually delivers salon-grade results, beginner-friendly tools, and every single thing you need—without making you run to the store for extras.
Disclosure: This article contains Amazon affiliate links. As an Amazon Associate, I earn from qualifying purchases. If you click on a link and make a purchase, I may earn a small commission at no extra cost to you.
Read: What to Use for 3D Nail Art
What’s Inside the Young Nails Acrylic Starter Kit
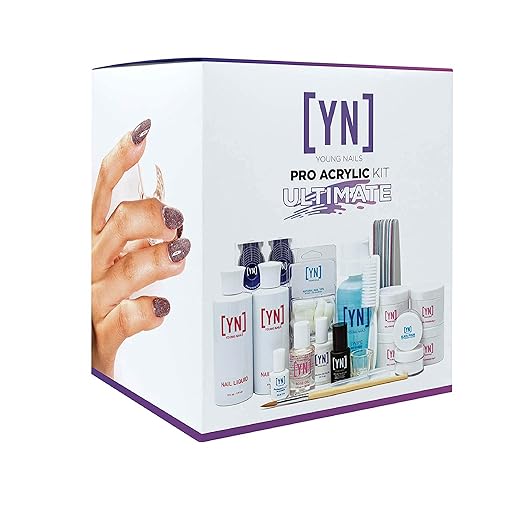
The Young Nails Pro Acrylic Kit – Core is packed with everything a beginner needs to create salon-quality acrylic nails from start to finish. Here’s a full breakdown:
1. Liquids & Essentials
- (2) 6 oz Nail Liquid (Monomer) – Professional-grade EMA-based liquid for smooth, bubble-free application.
- 8 oz Swipe – A nail surface cleanser that removes oils and dust before acrylic application.
- 1/4 oz Protein Bond – A non-acidic primer that helps acrylic adhere and prevents lifting.
- 1 oz Rose Cuticle Oil – Nourishes and hydrates cuticles after the set is complete.
2. Acrylic Powders
- 45 g Core Natural – Perfect for natural-looking sets.
- 45 g Core Clear – Crystal clear powder for encapsulations or overlays.
- 45 g Core Pink – Adds a subtle blush tone to nails.
- 45 g Core White – Ideal for French tips.
- 45 g XXX White – A super-bright white for dramatic nail designs.
3. Nail Finishing Products
- 1/3 oz Ultimate Finish Gel – A no-wipe glossy top coat for long-lasting shine.
- 1/2 oz Brush-On Glue – Strong adhesive for nail tips.
4. Nail Files & Buffers
- 150/150 grit file – Shapes and refines acrylic nails.
- 100/100 grit file – For faster product removal or shaping.
- 180/180 combo file – Perfect for smoothing.
- 240/240 combo file – Ideal for finishing and natural nail prep.
- 180/180 gray sponge file – Gently buffs the surface before top coat.
5. Nail Tips & Forms
- 50 pk Natural Assorted Tips – For a softer, natural look.
- 50 pk Clear Assorted Tips – Great for designs and encapsulations.
- 100 pk Nail Forms – For sculpting nails without tips.
6. Application Tools
- Acrylic Brush – Designed to hold the right amount of liquid and powder for smooth application.
- Manicure Brush – Cleans dust from the nail plate after filing.
- Plastic Eye Dropper – For precise monomer measurement.
- Glass Dappen Dish – Holds your monomer during application.
Unlike budget kits that cut corners, the Young Nails Starter Kit uses salon-grade formulas and tools—the exact type professionals use every day. You get every single product you need to prep, sculpt, shape, and finish a set of acrylic nails, making it truly all-in-one.
Why Beginners Love This Acrylic Nail Kit?
1. The Quality Is Salon-Level
The powders are buttery smooth, the monomer works perfectly with them, and the brush doesn’t shed bristles after two uses (which is common with cheaper kits).
2. You Can Learn the Right Way from the Start
Young Nails has an entire YouTube channel dedicated to step-by-step tutorials using their products. You can literally watch a pro walk you through your first set.
3. It’s Truly All-Inclusive
Unlike budget kits that send you searching for extra tools or better powder after one attempt, this kit covers everything from prep to finish.
What Nail Artists Are Saying?
On Reddit, beginners and pros alike highlight its value:
“YN Acrylic kit is amazing. Comes with everything you need to get started, including monomer and a quality brush, several acrylic powders, tips, a nail brush, forms, and more.” (Reddit)
“Young Nails has a kit with everything you need, and it’s very good quality…” (Reddit)
How to Use the Young Nails Acrylic Starter Kit?
If you’re opening your Young Nails Acrylic Starter Kit for the first time, take a deep breath — you’ve got everything you need to create a full set of salon-worthy acrylics right at home. The key is to move step-by-step, without rushing, so you get a feel for how the products work together.
1. Prep Your Natural Nails
Proper prep prevents lifting and helps your acrylics last.
- Wash your hands and dry them thoroughly.
- Push back and gently trim your cuticles.
- Shape your natural nails with the 240/240 file.
- Lightly buff the nail surface with the 180/180 sponge file to remove shine.
- Dust off with the manicure brush and cleanse with Swipe.
2. Apply Nail Tips or Forms
You can choose between nail tips and forms depending on the style you want. For tips, pick the right size from the Natural or Clear Assorted Tips, apply a small bead of brush-on glue to the well, and press it firmly onto your nail. Trim and shape them to your desired length.
If you prefer sculpted nails, slide a nail form under your free edge, making sure it fits snugly and lines up straight with your nail bed — this will give you a smooth base to build on.
3. Prime the Nails
Before you reach for the acrylic, apply Protein Bond to your natural nail surface (avoid the tips or forms). This step is crucial — it’s what helps your acrylic stick and stay put without lifting after a few days. Let it air dry; it’ll feel tacky, not wet.
4. Mix Your Acrylic Bead
- Pour monomer into the glass dappen dish.
- Dip the acrylic brush into monomer, then wipe one side on the dish edge.
- Touch the wet brush to your chosen acrylic powder to form a bead — not too wet, not too dry.
Beginners often start with smaller beads because they’re easier to control and less likely to flood the cuticle area.
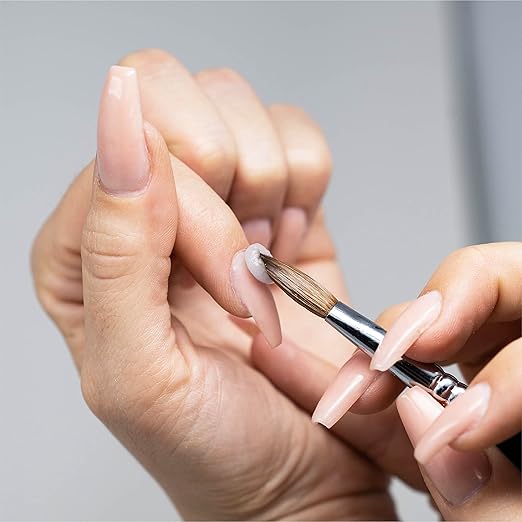
5. Apply the Acrylic
Place the bead near the cuticle (but not touching it). Gently pat and press the acrylic toward the cuticle, then pull it toward the free edge.
You’ll build the nail in small sections, overlapping slightly for a seamless finish. Acrylic starts to set fairly quickly, so work efficiently but without rushing.
6. File & Shape
Once the acrylic has fully hardened (tap it lightly — it should sound firm, not dull), grab your 100/100 grit file to refine the shape. Move to the 150/150 and 180/180 combo files to smooth the surface, making sure you keep the apex and sidewalls balanced. When you’re happy with the shape, brush away dust and cleanse again with Swipe.
7. Finish the Look
Now for the fun part — making your nails shine. Apply a thin coat of Ultimate Finish Gel and cure it if the formula requires it. Once that’s done, massage a little rose cuticle oil into the skin around your nails for a hydrated, polished look.
A Few Extra Tips for Beginners
The first set you do probably won’t look like a salon’s work — and that’s totally normal. Acrylic application is a skill you build over time. Work with small beads, keep your brush clean in monomer between strokes, and watch Young Nails’ free YouTube tutorials to see exactly how the pros hold their brush and move the product. The more you practice, the smoother and longer-lasting your nails will become.
SUMMING IT UP
The Young Nails Pro Acrylic Kit – Core isn’t just a collection—it’s your complete toolkit for stepping into the world of acrylic nails confidently. Whether you’re prepping, applying, or perfecting your first full set, everything is ready, and everything works beautifully.