
10 Easy Nail Art Designs for Beginners – No Tools Needed
Nail art doesn’t have to be complicated or expensive. You don’t need fancy tools and professional skills to create stunning designs at home. We have got the top 10 easy nail designs absolutely perfect for beginners. Kickstart your nail art journey from this very moment!
ALSO READ: Do your manicure at home without any professional tools
Disclosure: This article contains Amazon affiliate links. As an Amazon Associate, I earn from qualifying purchases. If you click on a link and make a purchase, I may earn a small commission at no extra cost to you.
1. Polka Dots
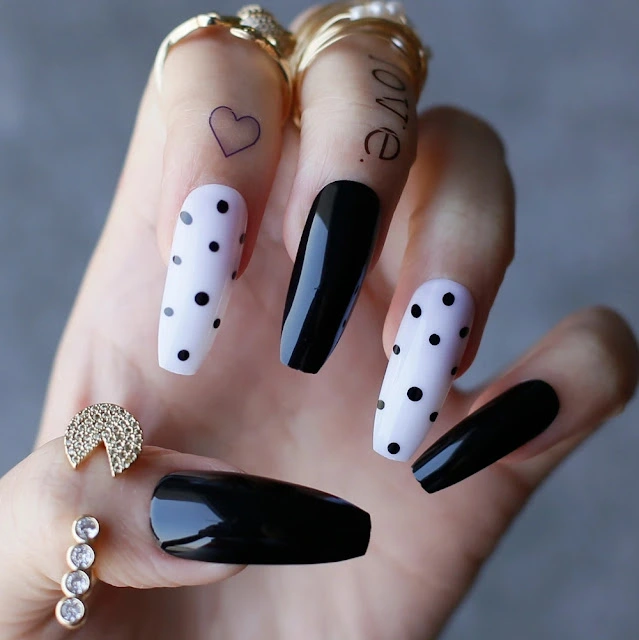
Polka dots instantly add charm to your nails. They’re timeless, perfect for any occasion, and totally customizable. Got a red dress? Fill in your nails with red polka dots. Spring season? Do them in beautiful pastel colors.
These cute little Polka dots can give you any kind of look (from bold to bright to subtle) without requiring much creative power.
How do you do polka dots?
Creating polka dots on nails is really easy. Use the tip of a bobby pin, toothpick, or even the brush handle for dotting purposes. Dip your improvised tool into contrasting nail polish and carefully place dots on your nails. Let them dry and finish with a topcoat.
Want a chic look? Keep the dots evenly spaced
Going for a playful vibe? Scatter them randomly.
2. Accent Nail
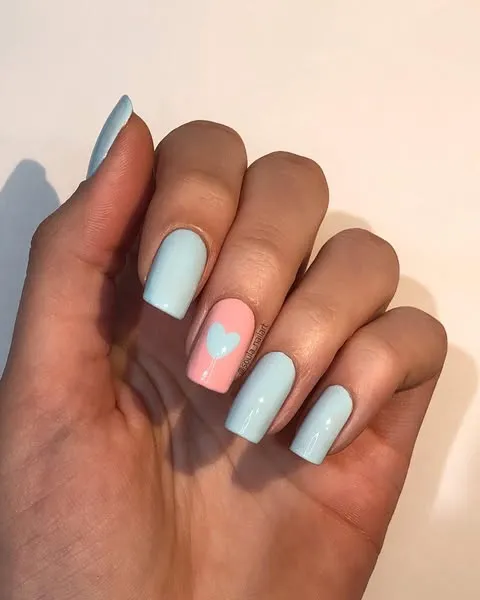
The accent nail trend is an effortless way to give your manicure a stylish twist. It’s versatile and works with any color combination or design. This technique highlights one nail, making it the star of your manicure. It gives your nails a trendy touch without overwhelming the overall look.
In this nail trend, you paint all your nails one color except for one (typically the ring finger). Now, for the accent nail, you have unlimited options like;
- Use glitter polish.
- Make a cute heart.
- Do a French tip.
- Add a bold contrasting color.
- Match your accent nail with your outfit.
3. Striped Nails
Stripes bring a sleek and modern vibe to your nails. They give you a clean, Insta-worthy aesthetic. Whether you go for clean, uniform lines or edgy, abstract patterns, striped nails are perfect for making a statement.
Here’s how you do stripe nail art
Using the edge of the nail polish brush, swipe thin lines across your nails in different directions(Vertical, horizontal, diagonal, etc). If you’re nervous about precision, uneven lines can give a cool abstract effect.
Stick to two or three complementary colors to keep it classy.
4. Gradient Nails
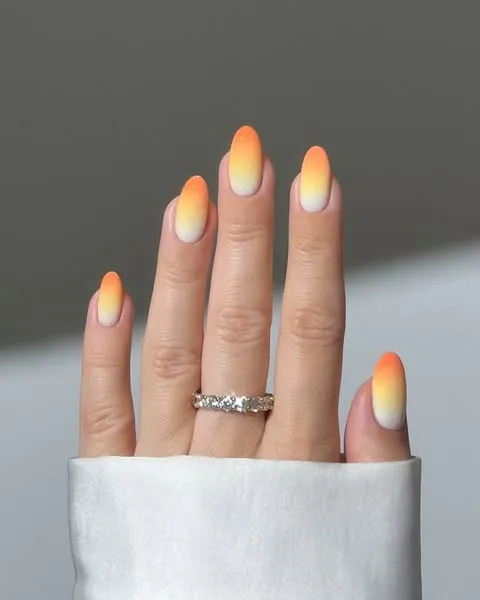
Gradient nails offer a soft, dreamy effect that’s perfect for both casual and formal settings. The blending of colors creates a unique and artistic look, and you can customize the shades for endless possibilities. This design is great for showcasing your creativity while keeping things simple.
How do you do gradient nail art?
Paint your nails with the lighter shade. Once it’s dry, layer the darker color starting at the tip of the nail and drag it downward with the brush. The goal is to create a fading effect so no harsh lines are allowed.
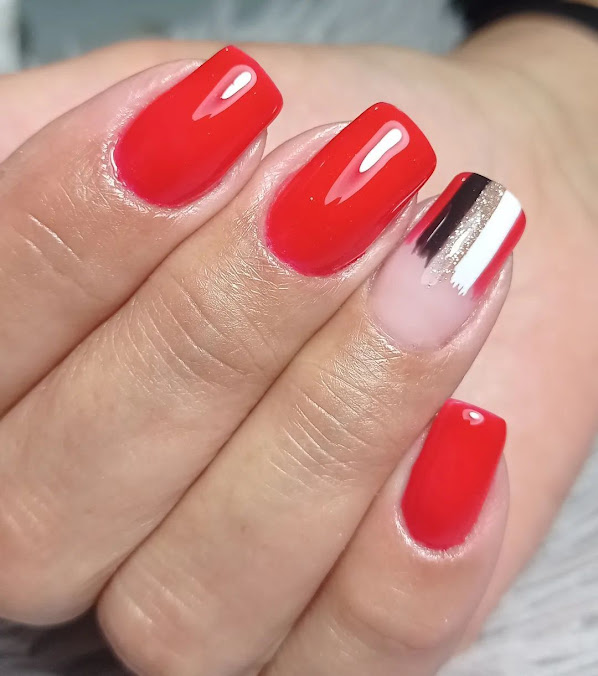
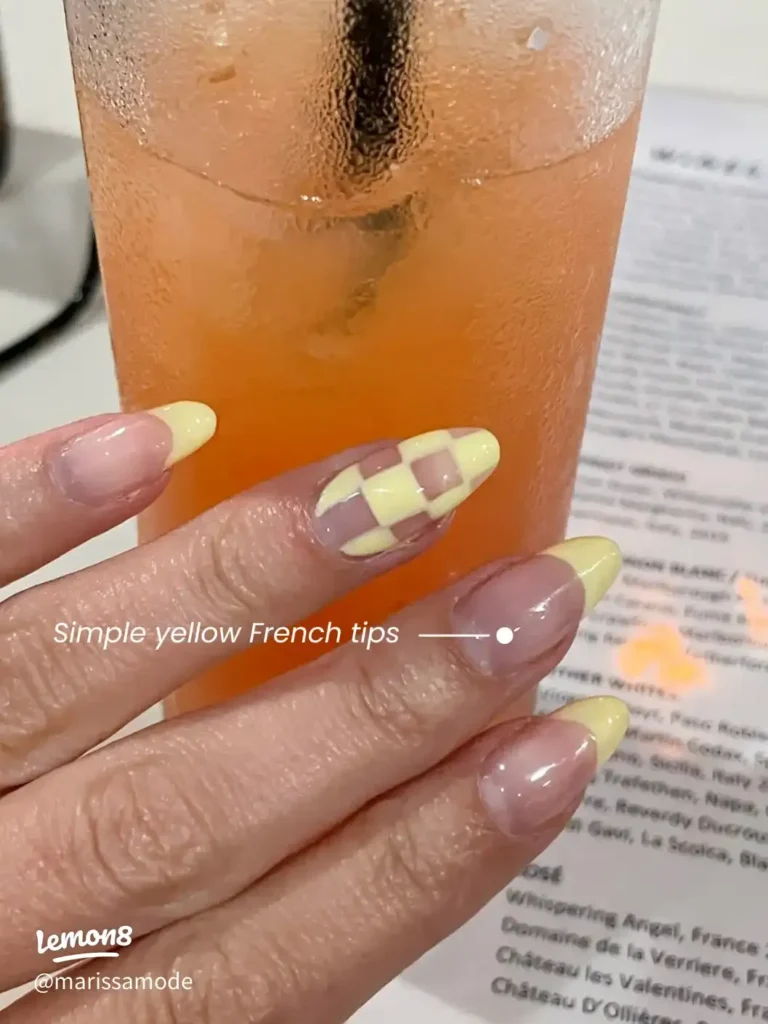
5. French Tip Twist

A modern take on the classic French manicure can instantly elevate your look. It’s the most elegant way of doing nail art. By switching up the traditional white tips for bold or metallic colors, you can create a fresh and trendy look that’s all your own. Here’s how you do it.
Instead of the usual white tips, use a bright or metallic polish. Carefully swipe the color along the tips of your nails. If your hands aren’t steady, use tape to create a clean edge.
You can also reverse it by painting the base of your nails (near the cuticle) instead of the tips. This has recently become very popular.
6. Flowers

Floral nail art is perfect for springtime. It’s a charming and feminine way to add a touch of nature to your manicure. You can make flowers as simple or intricate as you like, depending on your mood and skill level.
Steps to do floral nail art
Painting flowers on your nails is a pretty easy task.
- Start with a base color.
- Use a toothpick or bobby pin to create five dots in a circle for petals.
- Add a dot of another color in the center.
- Let it dry and seal it with a topcoat.
Experiment with different flower sizes or add leaves with a small brush stroke.
7. Abstract Swirls
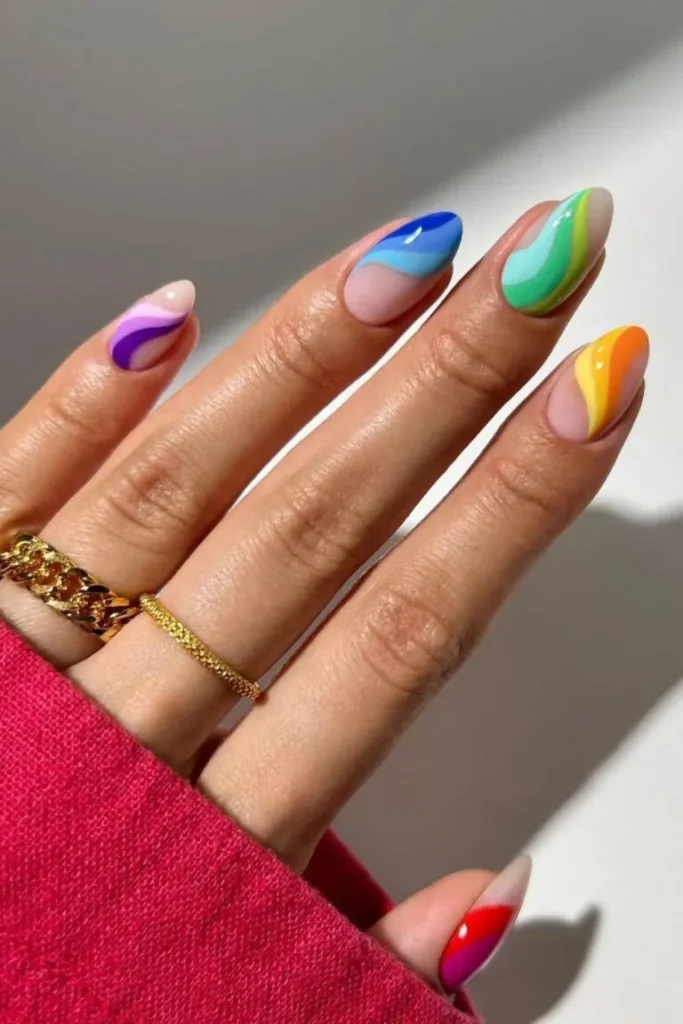
Abstract swirls are the epitome of effortless cool. This design is perfect for those who love a more artistic, modern look. Swirls can be bold or subtle, depending on the colors you choose.
To create swirl nail art, use the brush to create wavy lines or random squiggles on a dry base. No need for perfection — the charm is in the uniqueness.
8. Two-Tone Diagonals
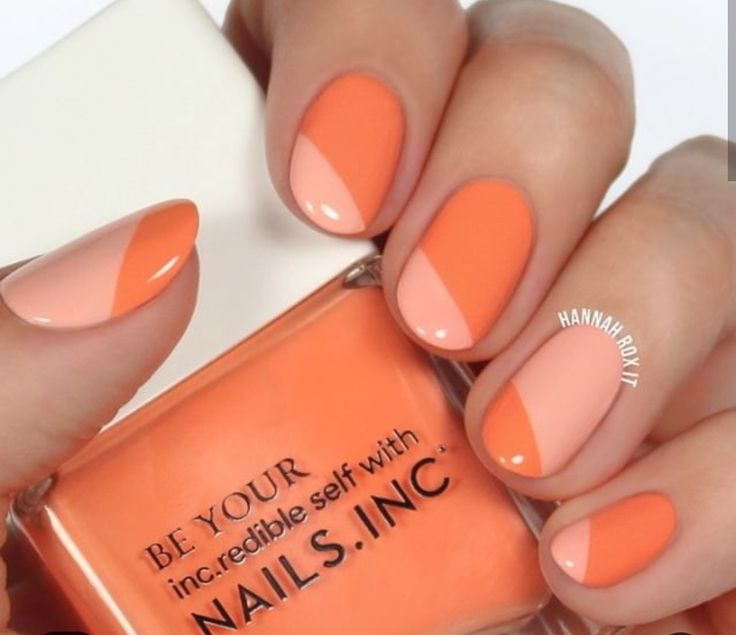
Two-tone diagonal nails are bold and eye-catching yet incredibly easy to achieve. This design adds a geometric element to your manicure. You can customize the angles and colors to create your own unique look. It’s a great way to make your nails stand out without a lot of effort.
How to do it?
Paint your nails with one color and let it dry completely. Use the nail polish brush to paint a diagonal line with a second color, filling in one side of the nail. You can also use a tape for this purpose.
9. Dot Grid
A dot grid is a minimalist yet striking design. You can make it work for any occasion. The clean lines and symmetrical dots create a polished look that’s both trendy and timeless. You can stick to one color for the dots or mix it up for added dimension.
Steps to do dot grids
- Paint your nails with a base color.
- Make a grid pattern on your nails with a thin brush.
- Use a toothpick or bobby pin to place small dots in a grid pattern. You can use two alternating colors for the dots to create more depth.
10. Glitter Gradient
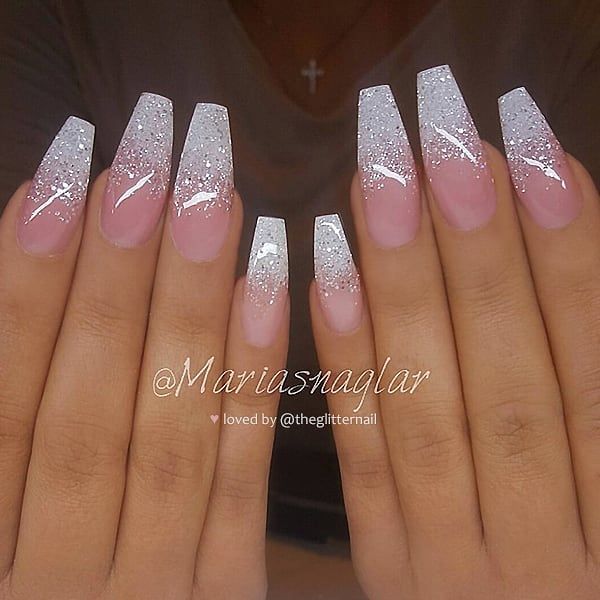
Glitter gradients are the perfect mix of subtle sparkle and bold glam. This design is ideal for parties, weddings, Holidays, Christmas, and Valentine’s Day. It’s versatile and works with any color base (Although pinkish nudes are common ones), making it a go-to choice for beginners and pros alike. Here’s how DIY glitter nails
- Apply a base color
- Let it dry.
- Take a glitter polish and dab it onto the tips of your nails.
- Blend it downward slightly for a gradient effect.
Pro tip: Use chunky glitter for a bold look or fine glitter for something subtle.
With these 10 designs, you’ll have endless fun experimenting with nail art at home. The best part? You don’t need to splurge on tools or products. Which design will you try first? Let us know in the comments!