
How to Do Marble Nails with Gel Like a Pro (Even If You’re a Beginner)
Marble nails are having a serious moment—and honestly, it’s easy to see why. That soft, swirled, almost-stone-like effect looks effortlessly luxe, like you just walked out of a high-end salon… even if you did them on your bedroom desk 💅
The best part? You don’t need to be a nail artist to pull this off. With gel polish, creating marble nails is actually way easier (and more forgiving) than it looks. The formula stays workable long enough for you to swirl, blend, and perfect your design before curing—aka no stress, no rush, just swirl and slay.
In this guide, I’ll walk you through exactly how to do marble nails with gel step-by-step, plus the tools you’ll need, beginner-friendly techniques, and a few pro tricks to make your design look clean—not muddy. Whether you’re going for a subtle nude marble or a bold black-and-white moment, you’ll be able to recreate that glossy, salon-quality finish right at home.
Let’s get into it 👀
What You Need to Create Marble Nails with Gel
Before we get into the swirling magic, let’s talk tools. The right products make all the difference between a clean, luxe marble effect and a muddy mess (we’re not doing that here).
i. Gel Nail Polish Colors (Light + Dark Combo)

For that signature marble look, you need at least two contrasting shades—a lighter base and a darker color to create the veins.
- Best picks: White + gray (classic marble), nude + brown, or black + white for drama
- Try:
- Beetles Gel Polish Set (great pigment + beginner-friendly). Add to Cart↗
- Modelones Gel Polish Kit (affordable and super smooth to work with). Add to Cart↗
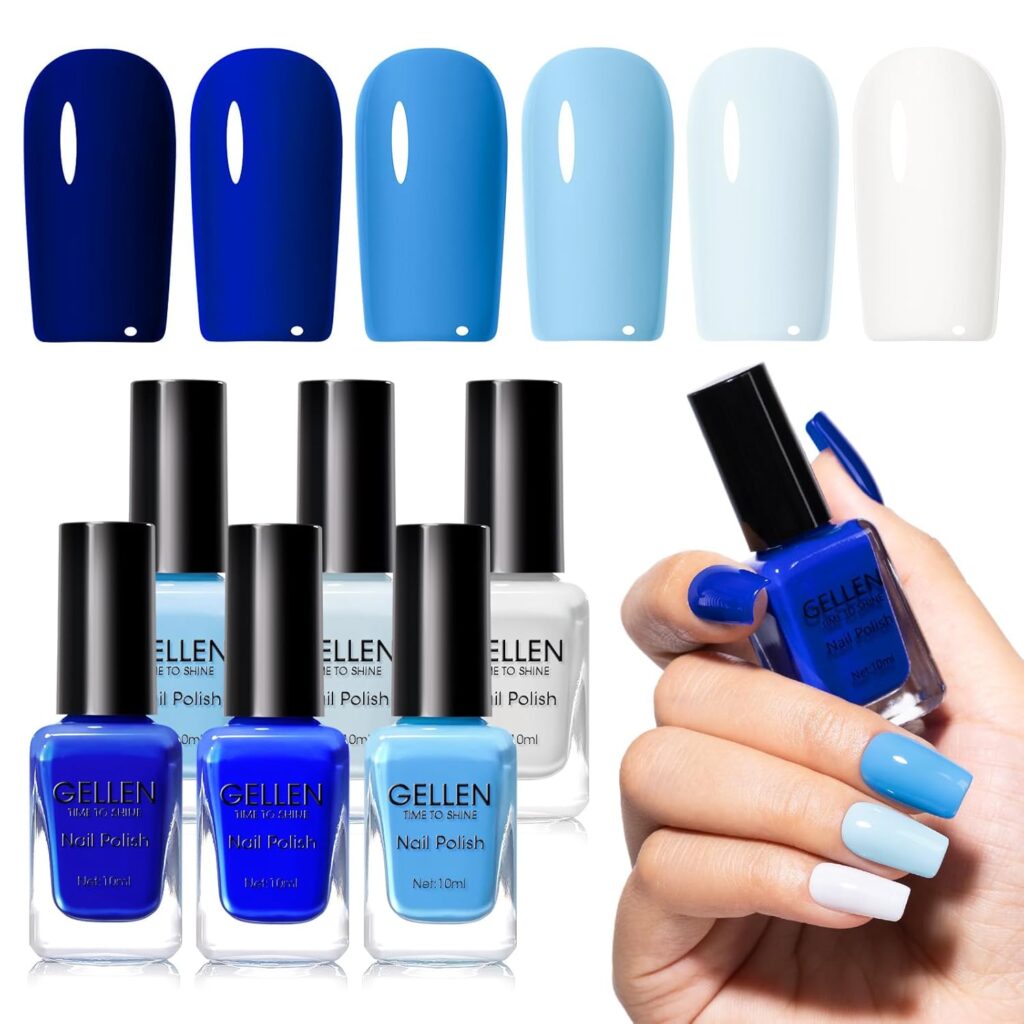
💡 Pro tip: Highly pigmented gels work best—they won’t spread too much or look sheer when you swirl.
ii. Base Coat and Top Coat
Think of these as your foundation and finish. A good base coat helps your gel stick better, while a glossy top coat seals everything in and gives that glassy, salon finish.
- Try:
- Beetles Gel Base & Top Coat Set (budget-friendly and reliable). Add to Cart↗
- Gelish Foundation Base Gel + Top It Off (more pro-level). Add to Cart↗
Don’t skip this step—your design won’t last without it.
iii. Nail Art Brush / Dotting Tool / Toothpick
This is what you’ll use to create those soft marble swirls.
- Nail art brush: Best for precise, wispy lines
- Dotting tool: Great for beginners (easy control)
- Toothpick: Works in a pinch if you’re DIY-ing at home
- Try:
- Makartt Nail Art Brush Set (super fine tips for detailing). Add to Cart↗
- Teenitor Dotting Tools Kit (perfect for beginners). Add to Cart↗
You will need to clean your tools between swirls to avoid muddy colors.
UV/LED Lamp
Gel polish doesn’t air dry—you need a lamp to cure (harden) each layer.
- Try:
- SUNUV LED Nail Lamp (fast curing + super popular). Add to Cart↗
- MelodySusie UV Lamp (great beginner option). Add to Cart↗
💡 LED lamps cure faster than UV, so they’re usually worth it.
Optional Tools for a More Professional Finish
These aren’t 100% necessary—but if you want that “wait, you did these at home?” finish… they help.
Blooming Gel (for easy marble effect)
This is a game-changer, especially for beginners. Blooming gel allows the colors to naturally spread and create that marble effect for you—no intense swirling skills required.
- Try:
- Beetles Blooming Gel. Add to Cart↗
- Makartt Blooming Gel Polish. Add to Cart↗
💡 Perfect if you struggle with blending—this does the work for you.
Nail Cleanser & Lint-Free Wipes
After curing, gel nails can have a sticky layer (totally normal). A nail cleanser removes that and leaves your nails looking shiny and clean.
💡 Regular cotton pads can leave fuzz—lint-free wipes keep things smooth and professional.
How to Do Marble Nails with Gel (Step-by-Step Guide)
This is where the magic happens ✨ Don’t worry—marble gel nails look complicated, but once you understand the flow, it’s honestly one of the most forgiving nail art techniques out there. Take your time, follow the steps, and remember: imperfect swirls = realistic marble.
Step 1 – Prep Your Nails Properly
If you want your marble nails to last more than a few days, prep is everything. Skipping this step is the #1 reason gel nails lift, chip, or peel early.
Start by:
- Removing any old polish completely
- Shaping your nails (square, almond, coffin—your vibe 💅)
- Gently pushing back your cuticles
- Lightly buffing the nail surface to remove shine
- Cleaning your nails with alcohol or nail cleanser to remove oils
Why does this matter?
Gel polish needs a slightly rough, oil-free surface to properly adhere. If your nails are too smooth or oily, the gel will lift—no matter how perfect your design is.
Step 2 – Apply Base Coat and Cure
Apply a thin, even layer of your gel base coat. Don’t overload the brush—thin layers are key for every step in gel nails. Cure under a UV/LED lamp (usually 30–60 seconds for LED, 2 minutes for UV—check your product instructions)
💡 Pro tip: Avoid touching your skin or cuticles with gel. If it floods the edges, clean it up before curing to prevent lifting later.
Step 3 – Apply Your Base Color
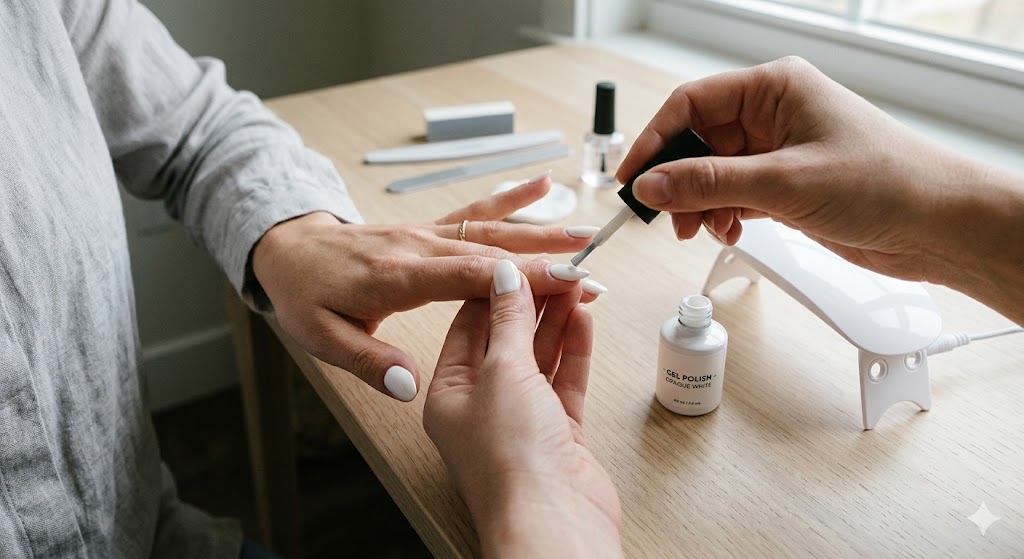
This is the background of your marble design, so choose wisely 👀
- Apply 1–2 thin coats of your chosen base color
- Cure each layer before moving on
💡 Best practice:
- Always use thin layers—thick coats can wrinkle or not cure properly
- Choose contrasting shades for your marble effect to stand out
Popular base colors:
- White (for classic marble)
- Nude (for soft, minimal looks)
- Black (for bold, dramatic marble)
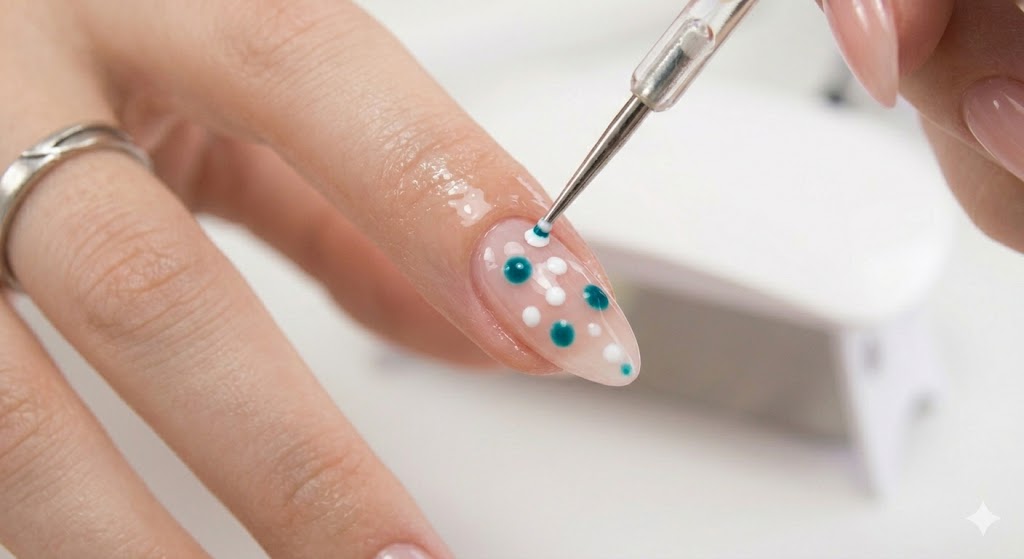
Step 4 – Add Marble Colors
Now it starts getting fun 🎨
Take your second (and third, if you want) gel colors and lightly apply small dots, lines, or random streaks over your base color. Don’t overthink placement—marble is naturally random.
💡 Best color combos to try:
- White + gray → classic stone marble
- Nude + gold → soft, luxe vibe
- Black + white → bold contrast
- Pastels (pink, blue, lavender) → dreamy, soft marble
Keep the application light—you’re not painting a full layer, just adding color for the swirl.
Step 5 – Create the Marble Effect (Swirl Technique)
This is the signature step—and where most beginners either nail it… or accidentally turn it into a muddy mess 😅
Using a fine nail art brush, dotting tool, or even a toothpick:
- Gently drag through the colors to create soft, flowing lines
- Use light pressure—let the colors blend naturally
💡 Golden rules for perfect marble:
- Don’t overmix → Too much swirling = muddy colors
- Avoid overworking → A few swirls are enough
- Clean your tool between swirls → Keeps colors crisp instead of blending into brown/gray
Think of it like swirling milk into coffee—soft, fluid, and not overdone.
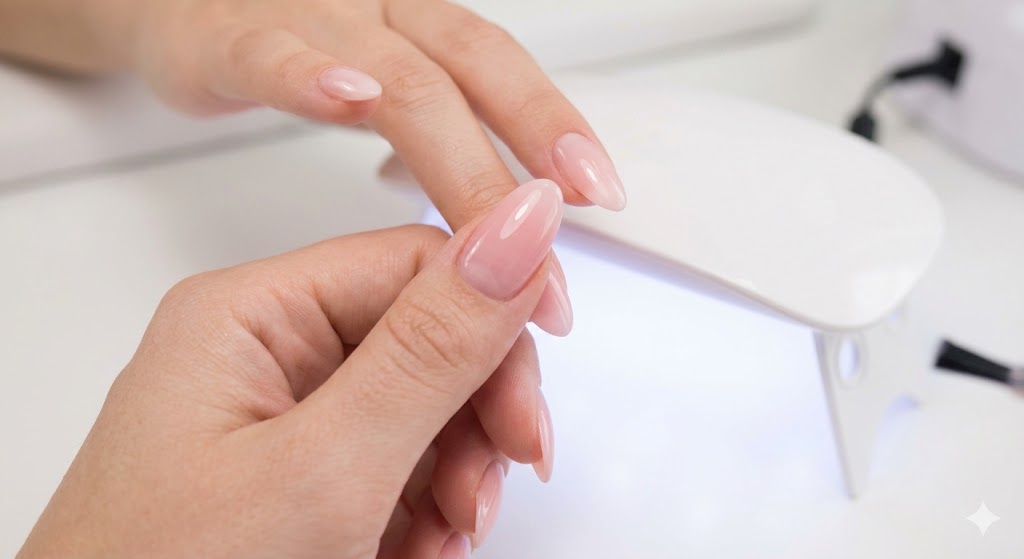
Step 6 – Cure the Design
Once you’re happy with your marble effect, it’s time to lock it in.
- Cure under your UV/LED lamp (follow product timing)
💡 Important: Don’t skip or rush curing. If the gel isn’t fully cured:
- Your design can smudge
- Layers may wrinkle
- The polish won’t last as long
Proper curing = crisp design + long-lasting nails.
Step 7 – Seal with Top Coat
This is what gives your nails that glossy, salon-level finish ✨
- Apply a thin layer of top coat
- Make sure to cap the edges (run the brush along the tip of your nail)
- Cure one final time
💡 Why this matters:
- Sealing protects your design from chipping
- Capping the edges prevents early lifting
- A good top coat enhances shine and depth (your marble will look chef’s kiss)
And that’s it—you’ve officially mastered marble gel nails at home 💅
Different Techniques to Create Marble Gel Nails
Not all marble nails are created the same—and that’s actually a good thing. Depending on your skill level (and how much control you want), there are a few different ways to get that dreamy swirl effect.
Whether you’re a total beginner or trying to level up your nail game, these techniques let you customize the look—from soft, diffused marble to sharp, high-contrast veining.
Blooming Gel Technique (Easiest Method)
If you’re new to marble nails, this is your best friend.
Blooming gel is specially formulated to make colors spread (or “bloom”) on their own, creating that natural marble effect without much effort. Basically, it does the blending for you.
How it works:
- Apply your base color and cure
- Add a thin layer of blooming gel (do NOT cure yet)
- Drop small amounts of your marble colors onto the wet surface
- Watch them spread and create a marble effect automatically
- Once you’re happy with the design, cure
💡 Why it’s amazing:
- Perfect for beginners
- Creates soft, organic marble patterns
- Requires minimal swirling
💡 Keep in mind:
Use small amounts of color—too much product will spread excessively and blur everything together.
Dry Marble Technique (More Control)
If you like precision and want more defined marble lines, the dry marble technique gives you full control over your design.
Instead of letting colors blend on their own, you create the marble effect manually over a cured base.
How it works:
- Apply and cure your base color
- Add small خطوط (lines or dots) of your marble colors
- Use a fine brush or tool to lightly drag and shape the design
- Cure once you’re satisfied
💡 Why choose this method:
- More control over placement and pattern
- Great for bold, defined marble veins
- Ideal for black-and-white or high-contrast looks
💡 Watch out:
Avoid using too much gel—thicker layers make it harder to control the design and can look bulky after curing.
Wet-on-Wet Technique (Most Popular)
This is the classic marble method—and the one you’ll see all over Instagram and Pinterest.
Here, you work with uncured gel so the colors naturally blend just enough while you swirl them.
How it works:
- Apply your base color (do NOT cure yet, or apply a second uncured layer)
- Add drops or streaks of your marble colors
- Use a brush or dotting tool to gently swirl the colors together
- Once you like the effect, cure
💡 Why people love it:
- Creates that perfect balance of soft + defined marble
- Looks the most “natural” and stone-like
- Super versatile for different styles
💡 Golden rules for this technique:
- Control your blending → Too much swirling = muddy colors
- Don’t overload product → Excess gel causes flooding and uneven curing
- Work quickly but gently—the gel will start to self-level as you go
No matter which technique you choose, the key is the same: less is more. Use thin layers, light pressure, and controlled blending to keep your marble looking clean, not cloudy.
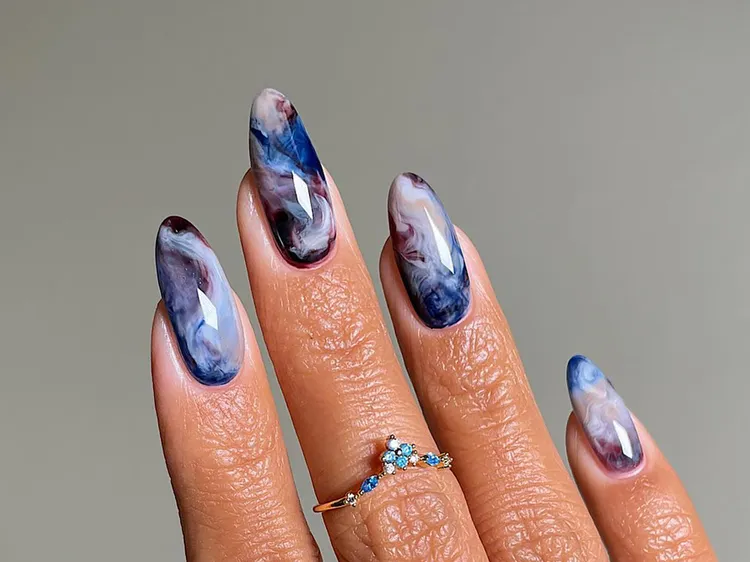
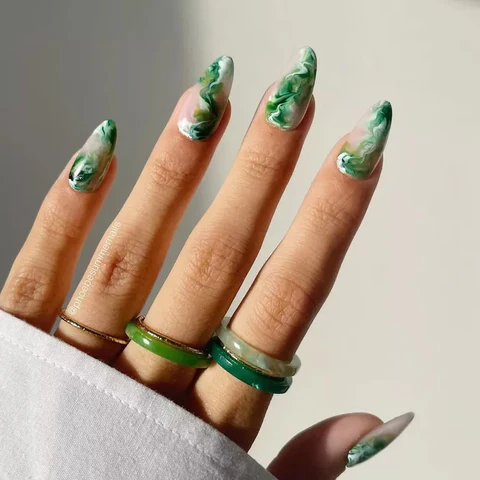
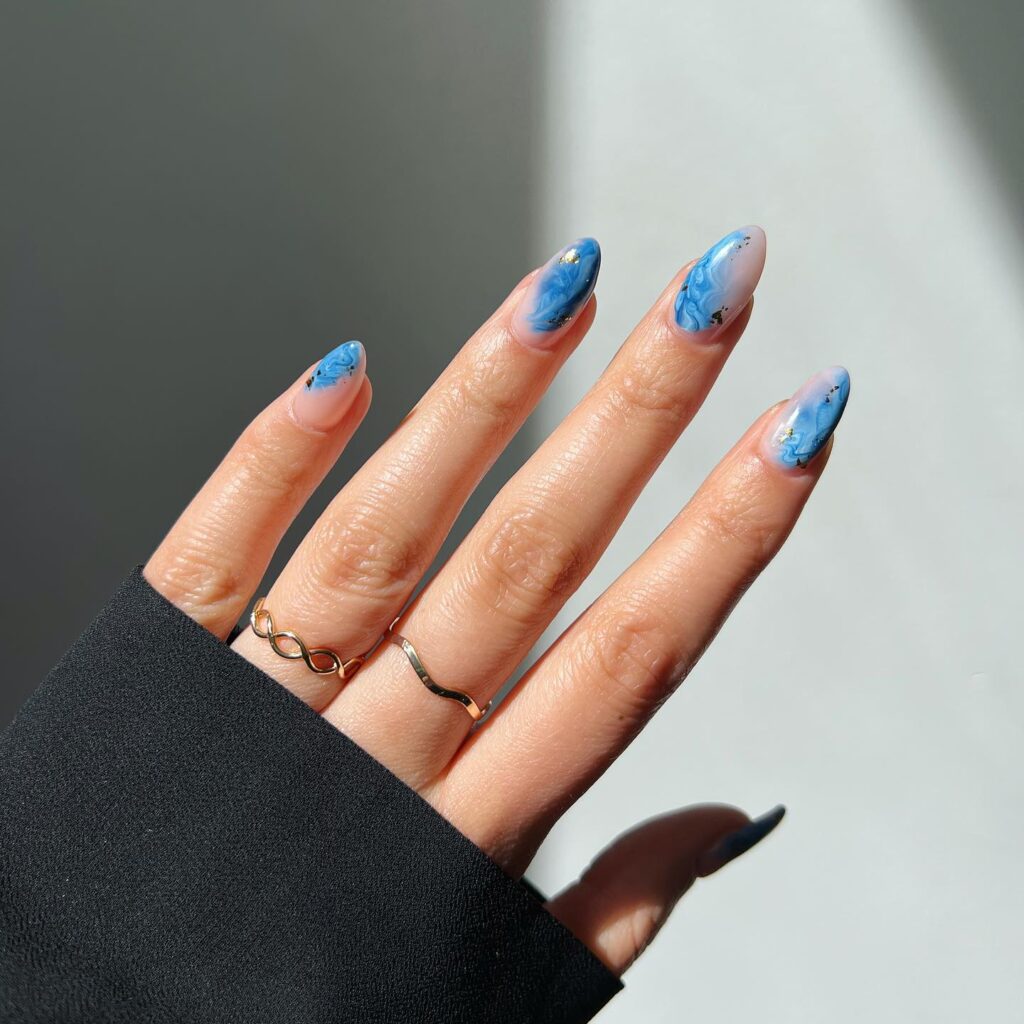
Marble Gel Nail Design Ideas You’ll Want to Copy
If you’re looking for some inspiration, here are a few marble gel nail styles that are totally scroll-stopping—and doable at home:
- Minimal Accent Marble Nails: Keep it simple with one or two marble accent nails on a neutral base. Perfect if you love subtle elegance but still want that marble vibe.
- Full Marble Set: Go all out and marble every nail. This makes a bold, luxurious statement—think glossy, high-contrast swirls.
- French Tip Marble Design: A modern twist on a classic. Marble the tips while keeping the base neutral for a chic, sophisticated look.
- Gold Foil Marble Nails: Add tiny flecks of gold foil over your marble for an instant luxe upgrade—perfect for parties or glam selfies.
How to Make Your Marble Gel Nails Last Longer
Long-lasting marble nails are all about a few key habits:
- Proper nail prep is everything—clean, buffed, and oil-free nails = longer wear
- Cap the edges with top coat to prevent premature chipping
- Avoid water immediately after application to let the gel fully set
- Use cuticle oil daily to keep nails hydrated and your design looking fresh
Final Thoughts: Is Marble Gel Nail Art Worth It?
Marble gel nails are the perfect mix of elegance and fun. They might look complicated, but with the right tools, techniques, and a little patience, anyone can create a professional-looking marble manicure at home.
Whether you go subtle with accents or bold with full sets, this nail art style is timeless, versatile, and absolutely worth the effort. Plus, once you master it, you’ll have endless possibilities to mix colors, patterns, and textures—so every manicure feels fresh and unique.