
How to Use a Nail Buffer? Complete Step-by-Step Guide
Achieve glossy, healthy nails without a salon visit!
Nail buffers are a fantastic tool for achieving naturally beautiful, healthy-looking nails without the need for polish. They can smooth out ridges, remove stains, and leave your nails with a gorgeous, glossy shine. Whether you’re looking for a natural look or preparing your nails for a manicure, this guide will walk you through the process of using a nail buffer like a pro.
Disclosure: This article contains Amazon affiliate links. As an Amazon Associate, I earn from qualifying purchases. If you click on a link and make a purchase, I may earn a small commission at no extra cost to you.
What is a Nail Buffer?
A nail buffer is a multi-sided tool, usually rectangular or block-shaped, with different grits or textures on each side. These sides are designed to perform different functions, from filing and shaping to buffing and polishing. They’re a great alternative to harsh chemicals and can be used on natural nails, acrylics, and even gel nails (with caution and a light touch).
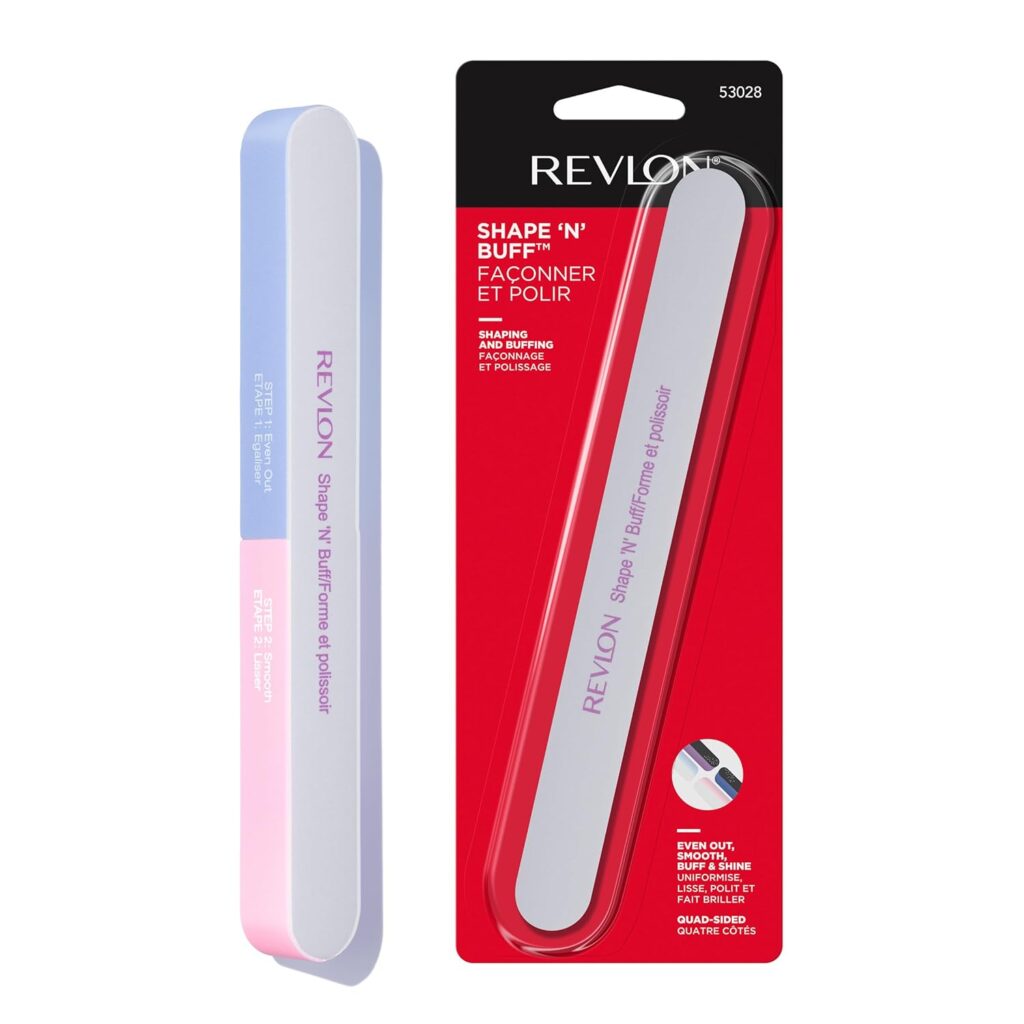
Most buffers have 3–4 sides, each with a different grit:
- Coarse Grit (100–180): Removes ridges and imperfections.
- Medium Grit (180–240): Smooth the surface.
- Fine Grit (240–400): Pre-polishes for a soft shine.
- Shine Side (No Grit): Adds a high-gloss finish.
Types of Buffers:
- Block Buffers: Durable, rectangular tools with labeled steps.
- Foam Buffers: Gentle, ideal for sensitive nails.
- Electric Buffers: Quick, but require caution to avoid over-buffing.
Buffing vs. Filing:
- File: Reshapes nails and shortens length.
- Buffer: Focuses on surface smoothness and shine.
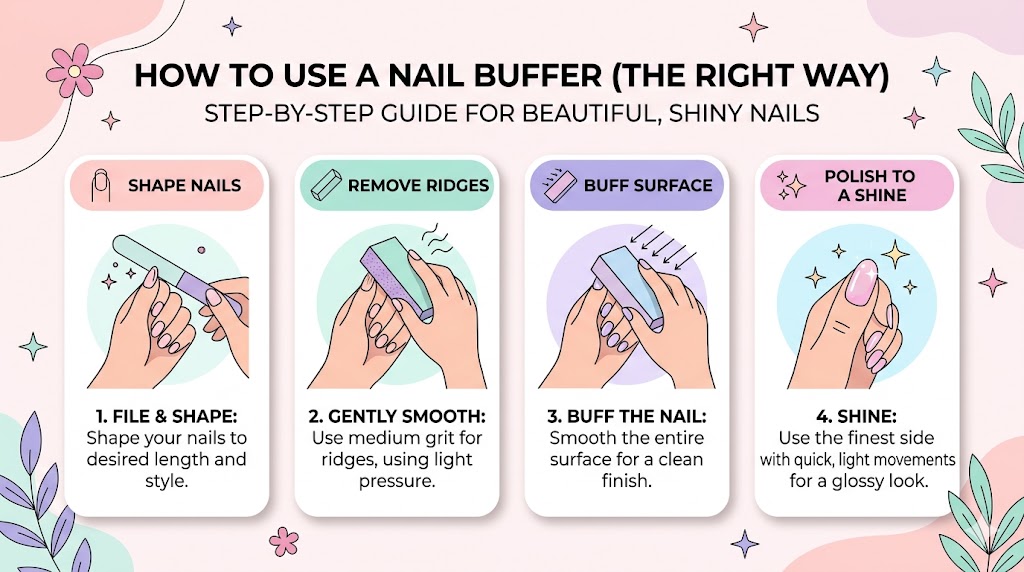
Step-by-Step Guide to Buffing Your Nails
Pro Tip: Limit buffing to once every 2 weeks to prevent weakening nails.
Tools Needed: Nail buffer, cuticle oil, moisturizer.
i. Prepare Your Nails
Start by removing any existing nail polish. Trim your nails to your desired length and shape using a nail clipper and file. If you have particularly rough or uneven nails, you can use the coarsest side of the buffer to gently even them out before moving on to the next steps.
ii. File and Shape (Optional):
If needed, use a separate nail file or the coarsest side of your buffer (if it has one designed for this) to shape your nails. File in one direction only to avoid splitting or weakening the nail.
iii. Buffing Stage 1 (Coarse/Medium Grit):
Begin with the coarser side of your buffer. Gently buff each nail in one direction only, using short, even strokes. Avoid excessive pressure, as this can damage your nails. Focus on smoothing out ridges and any imperfections. Don’t over-buff; a few passes on each nail should be sufficient.
iv. Buffing Stage 2 (Medium/Fine Grit):
Move on to the next finer grit. Repeat the buffing process, again using short, even strokes and focusing on smoothing the nail surface further.
v. Buffing Stage 3 (Fine Grit):
Use the fine grit side to further refine the nail surface and begin to bring out the shine.
vi. Polishing Stage (Ultra-Fine Grit/Shine Side):
Finish with the finest grit or the designated “shine” side of the buffer. This side is usually very smooth and is used to polish the nail to a high gloss. Buff vigorously in a back-and-forth motion to create a natural shine.
vi. Moisturize
Buffed nails absorb oils better, making hydration critical. After buffing, apply a cuticle oil or hand lotion to moisturize your nails and cuticles. Buffing can sometimes dry out the nails, so it’s important to replenish moisture.
Also Read: What is a Buff Manicure↗
Check Progress: After each step, run your fingertip over the nail. It should feel smoother than the previous step.
How often should I buff? Every 2 weeks for natural nails.
Why does my buffer leave dust? That’s normal—it’s keratin debris from filing.
Benefits of Using a Nail Buffer
Nail buffers offer a multitude of benefits, starting with their ability to smooth out the natural ridges that develop on nails, resulting in a more even surface. Beyond smoothing, the coarser sides of a buffer can also help diminish surface stains caused by nail polish, smoking, or certain foods.
Buffing goes beyond mere cleaning, though; it also enhances shine, creating a natural, healthy gloss without the need for nail polish. This smoothing action also prepares nails for a manicure by creating a smooth base, allowing polish to adhere better and last longer. Finally, the buffing action can stimulate blood flow to the nail bed, promoting healthier nail growth from the root.
Expert Tips for Flawless Results
Here are some important tips that will give you salon-worthy results.
- Pressure Matters: Let the buffer do the work—no heavy pressing.
- Replace When Worn: A dull buffer won’t perform well.
- Don’t Over-Buff: Buffing too frequently or too aggressively can weaken your nails. It’s generally recommended to buff your nails no more than once or twice a month.
- One Direction: When using the coarser grits, buff in one direction only to prevent splitting. For the polishing stage, a back-and-forth motion is acceptable.
- Clean Your Buffer: Regularly clean your buffer with soap and water to remove debris and prevent the spread of bacteria.
- Listen to Your Nails: If you experience any pain or discomfort while buffing, stop immediately.
Conclusion
Buffing can be a great addition to your regular nail care routine. It’s a fantastic way to maintain healthy, natural-looking nails without relying on nail polish. You can also use buffing as a first step before applying nail polish to create a smoother, longer-lasting manicure.
By following these steps and tips, you can achieve beautifully smooth and shiny nails with a nail buffer. Enjoy the natural, healthy glow!