Summer flower nails | Red and Pink Marble | EASY DIY
If you’re looking for a manicure that screams summer without being over-the-top, these summer flower nails are exactly what you need. This design combines rich berry tones with soft pastel marbling, delicate floral accents, and tiny gold details that make your nails look like miniature works of art.
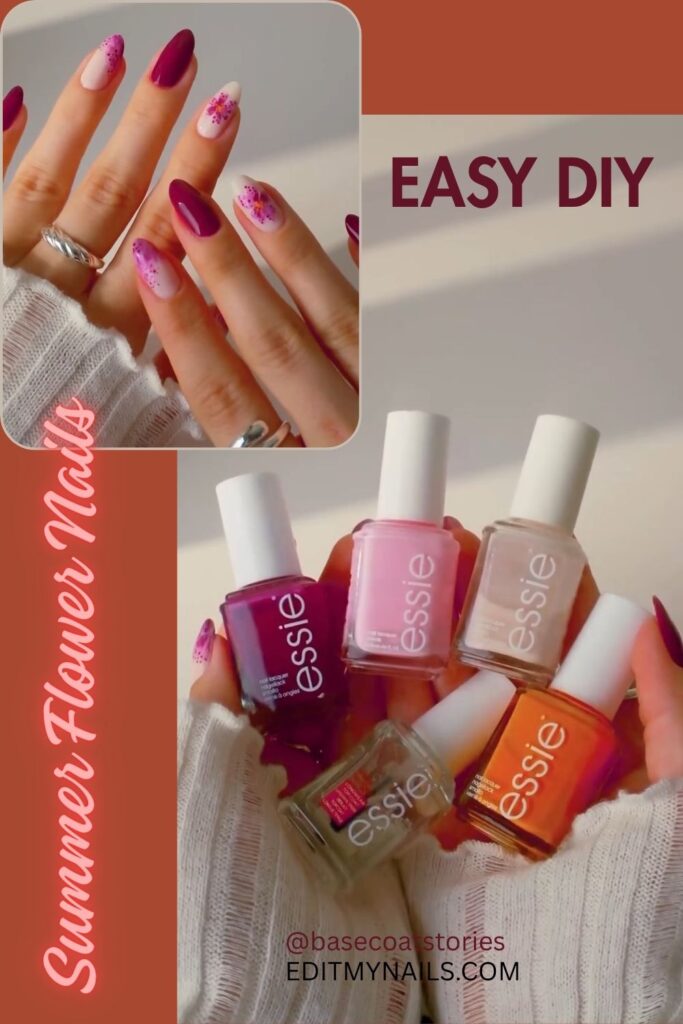
The best part? You don’t need fancy nail art tools. A simple wooden cuticle stick (or even a toothpick) can help you recreate this gorgeous look at home.
Let’s walk through everything you’ll need and every step to achieve this beautiful floral manicure.
Products You’ll Need
Before you get started, gather these supplies:
- Essie Bahama Mama – A rich plum-berry cream polish for the solid nails, marbled details, and dots. ADD TO CART↗
- Essie Muchi Muchi – A soft pastel pink that creates the dreamy marble effect. ADD TO CART↗
- Essie Metallic Gold Polish – For the flower centers. ADD TO CART↗
- Essie Stay Longer Top Coat – Adds shine and helps your manicure last longer. ADD TO CART↗
- Wooden cuticle stick or toothpick
- Small plastic palette (or any smooth disposable surface)
- Nail tape or regular Scotch tape for easy cleanup
Step 1: Paint Your Base
Start by applying your base colors. Paint your index and pinky nails with two thin coats of Bahama Mama. Allow each coat to dry before applying the next.
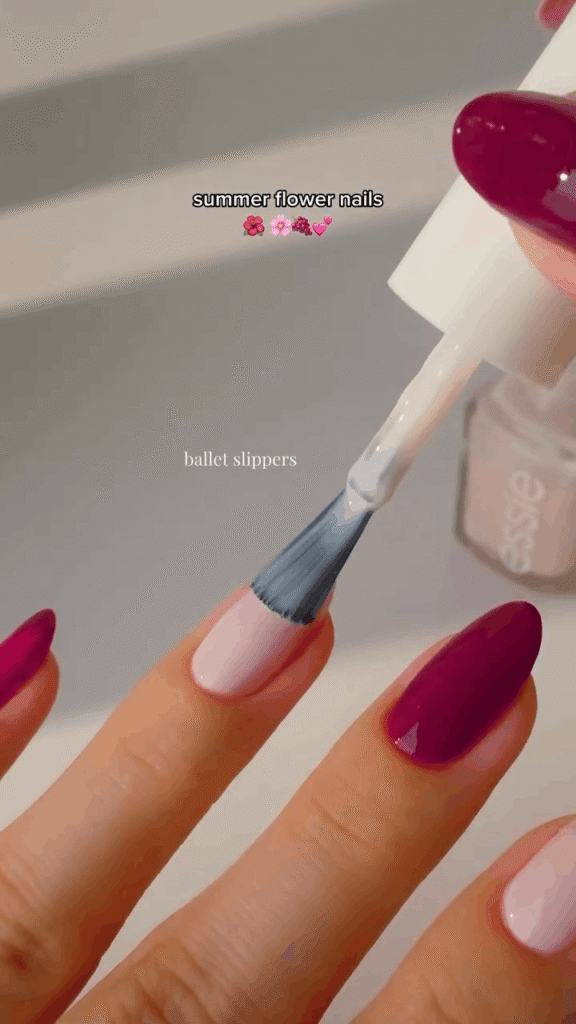
For your thumb, middle, and ring finger, apply two coats of Muchi Muchi or another sheer milky pink polish. These nails will become your accent nails, so make sure they’re completely dry before moving on.
Step 2: Create the Marble Effect
Now comes the fun part.
Place a generous drop of Bahama Mama beside a drop of Muchi Muchi on your plastic palette.
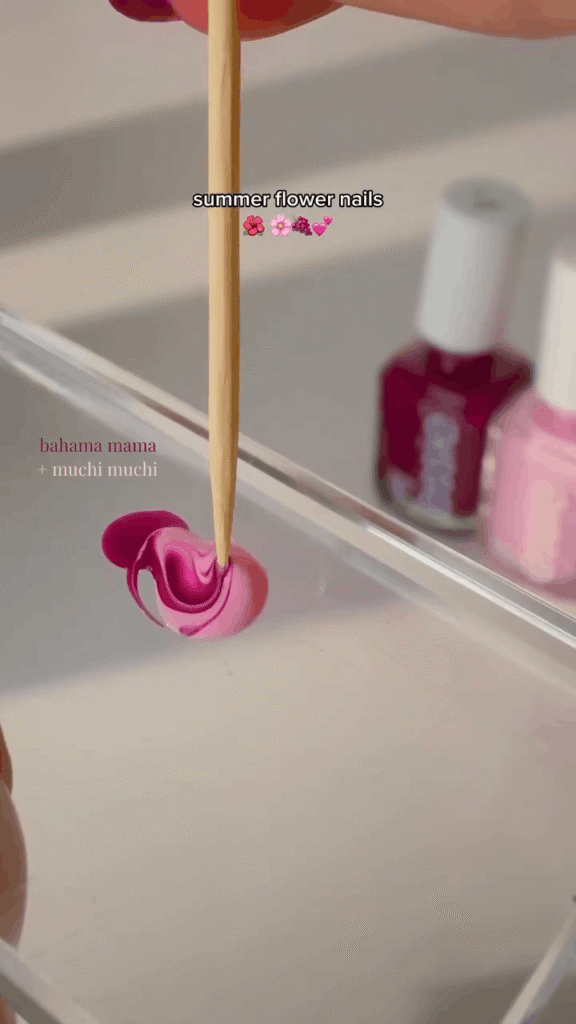
Using your wooden stick, gently swirl the two colors together where they meet.
Don’t completely mix them—you want visible ribbons of dark berry and soft pink. That’s what creates the beautiful marble finish.
Step 3: Make the Marbled French Tips
To keep your fingers clean, wrap tape around the sides and tips of your thumb and middle finger.
Gently press the tips of your nails into the swirled polish mixture, then lift them straight back up. The marble pattern transfers instantly, creating a unique French tip every single time.
Peel away the tape while the polish is still wet for crisp edges.
No two marbled tips will ever look identical—and that’s exactly what makes them so pretty.
Step 4: Create the Floral Accent
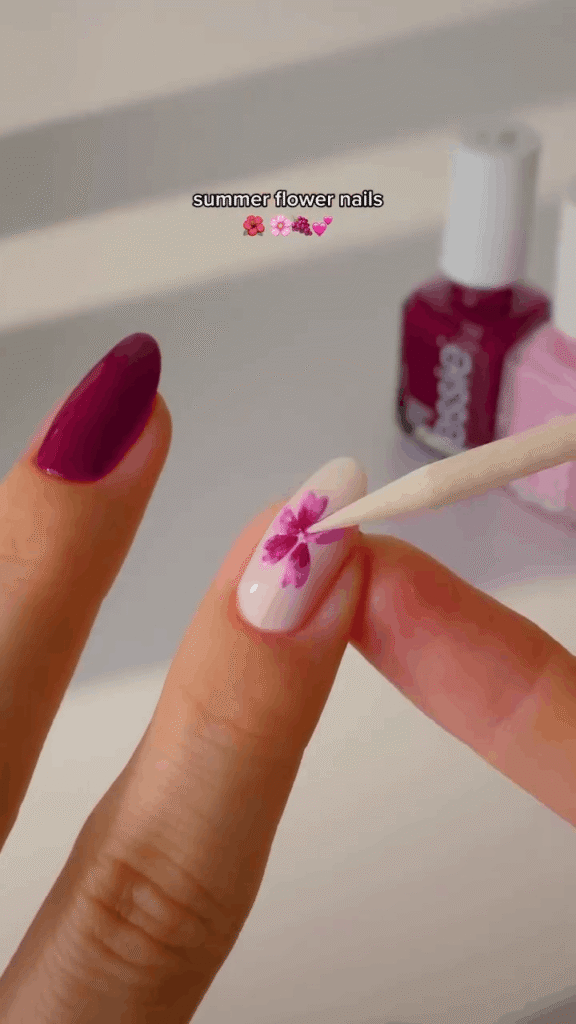
Your ring finger becomes the star of the manicure.
Dip the tip of your wooden stick into the marbled polish mixture, making sure it picks up both colors.
Press the stick onto the nail, then drag it slightly outward to create one petal.
Repeat this process five times in a circle until you’ve formed a complete flower.
If the marble starts blending too much, simply wipe off your stick and dip into a freshly swirled section of polish.
Step 5: Add the Finishing Details
These little details make the entire manicure pop.
Using fresh Bahama Mama, dip your stick into the polish and create tiny dots cascading down from the marbled French tips on your thumb and middle finger.
Scatter a few dots around the flower on your ring finger to tie the whole design together.
Finally, dip the stick into your gold polish and place one small dot in the center of the flower. It’s a tiny touch that instantly elevates the entire look.
Step 6: Seal Everything In
Once your nail art has dried for a few minutes, finish with a generous coat of Essie Stay Longer Top Coat.
The top coat smooths out the marble texture, protects your artwork, and leaves your nails with that glossy, salon-quality finish everyone loves.
Tips for the Best Results
- Work one accent nail at a time while the marble mixture is fresh.
- Avoid over-mixing the polish—the distinct color ribbons create the prettiest marble.
- Thin coats dry faster and reduce smudging.
- Let each layer dry before adding details for cleaner nail art.
- Finish with a high-quality glossy top coat to maximize shine and durability.
Final Thoughts
These summer flower nails perfectly balance elegance and playfulness. The deep berry polish keeps the design sophisticated, while the soft marbled tips and delicate floral accent give it a fresh seasonal feel.
Whether you’re heading to brunch, a beach vacation, or simply want a manicure that stands out, this look is guaranteed to earn compliments. Best of all, every marbled tip turns out slightly different, making your manicure completely one of a kind.
